Wallpaper Installation Guide
Discover the satisfaction of a job well done! Here’s the step-by-step guide to applying your wallpaper and keeping it clean over time. Five operations to do with care and all the tips to avoid the unexpected… or fix them!


Don’t get caught unprepared, check the status of your wall before you start and arrange the material. Read the instructions below or if you prefer download the guide to print it!
01
Before you start
The preparation of the wall
For optimal installation, the wall must have smoothsurface, plaster-shaved or tinged on a plaster-shaved wall. In addition, it is necessary to check the verticality: any irregularities do not allow the perfect vertical fall of the wallpaper sheets during laying and complicate the juxtaposition of the joints.
02
Organize tools
For each step you need specific tools
- Ruler
- Cutter
- Level or plumb line
- Bucket
- Soft spatula or roller (foam rubber)
- Roller or brush (medium-haired/short-haired to avoid splashing)
- Soft cloth
- Primer for walls
- Wallpaper glue
The extra tip
If you also ordered glue with the wallpaper, inside the package you will find Adehesiva U, a universal adhesive for wall coverings. Very absorbent surfaces require to be previously treated with primer.
Dilute the entire package of glue in 5-6 L depending on the type of wallpaper you have purchased (see specific instructions on the glue package).
• Dilute the contents of the bag in cold water, mixing quickly.
• Leave the glue to rest for about 5 minutes, then stir vigorously. The product is ready in 5 min.
• Apply the glue directly to the wall with a short-haired wool roller.
03
Prepare the wall for laying
The surface must be clean, defect-free and light in colour
Clean the wall with the soft cloth.
Apply the wall primer with the roller and proceed to make the surface homogeneous and ready for laying.
While you wait for the dry primer to check and prepare the sequence of the wallpaper sheets.
NB. The primer is not necessary if the wall has a smooth and compact surface and if whitewashed with washable paint.
The plus advice
If you come across any wall defects, such as holes, you can use a plasterboard compound. Apply it with a spatula, wait for it to dry completely and sand the excess. Last step: Pass the wall again with a viscous cloth to remove the sanding powder.
04
Apply wallpaper
It is time for plumb line, glue and the application of the wallpaper
Start on the left corner of the wall and take the measurement of the first sheet. Draw a vertical pencil mark at its right end, without considering the bleed on the left, so as to have the precise size of the first sheet.
Use lead wire to draw other vertical marks on this same size, they will serve as a guide to apply the first perfectly perpendicular sheet.
Now prepare and mix the glue so as to avoid lumps, spread it on the portion of the wall that affects the second sheet, without overloading the roller in order to avoid drops.
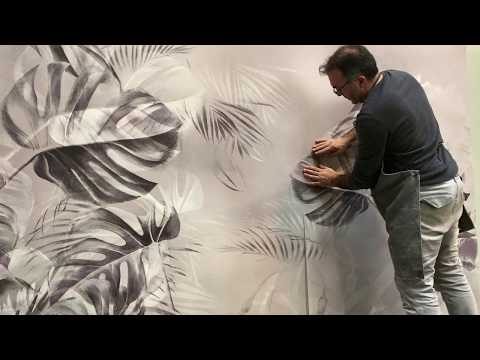
First laying the second sheet, the marks shown on the wall indicate where to start. Unroll the wallpaper from top to floor leaving bleeds on both sides (floor and ceiling). Use the soft spatula with a smooth movement from top to bottom and from the inside of the cloth outwards.
After applying the first cloth trim the bleeds to the floor and ceiling and gently clean the glue residues by dabing with the sponge soaked in water. DO NOT rub.
Continue with the application of all the sheets, starting on the left from the first, which brings the bleeds back to the left corner. Refine the surplus sheet to sheet in a timely manner. Remember that the last sheet will also have the bleeds on the right side.
The extra tip
Check from the beginning that it is perfectly leaded, laying the first sheet of wallpaper is the most important step for the success of the entire application. Before application washes your hands to avoid marks on paper. Be careful that the roller does not come into contact with glue already on the wall and make sure that the edges are well glued.
05
Maintenance and cleaning
Do not use abrasive products or aggressive detergents
If you chose Living wallpaper in tnt only you can clean it with a soft dry cloth as many times as you want, the water would risk over time ruining the surface.
If it is pro wallpaper in tnt + PVC you can use a soft cloth soaked in water, dab and DO NOT rub. The vinyl surface layer makes it washable and more durable.
Here you are at the end of the wallpaper installing guide. All you have to do is let the decoration rest to make it dry completely and experience your new charming atmosphere.
If you have any doubts you can find the details of each step in the DIY installer manual.
If you do not want to dedicate yourself to the application you can contact us to look for a trusted decorator, we are committed to reporting the accredited professional services closest to you or to give you the suggestions you need!